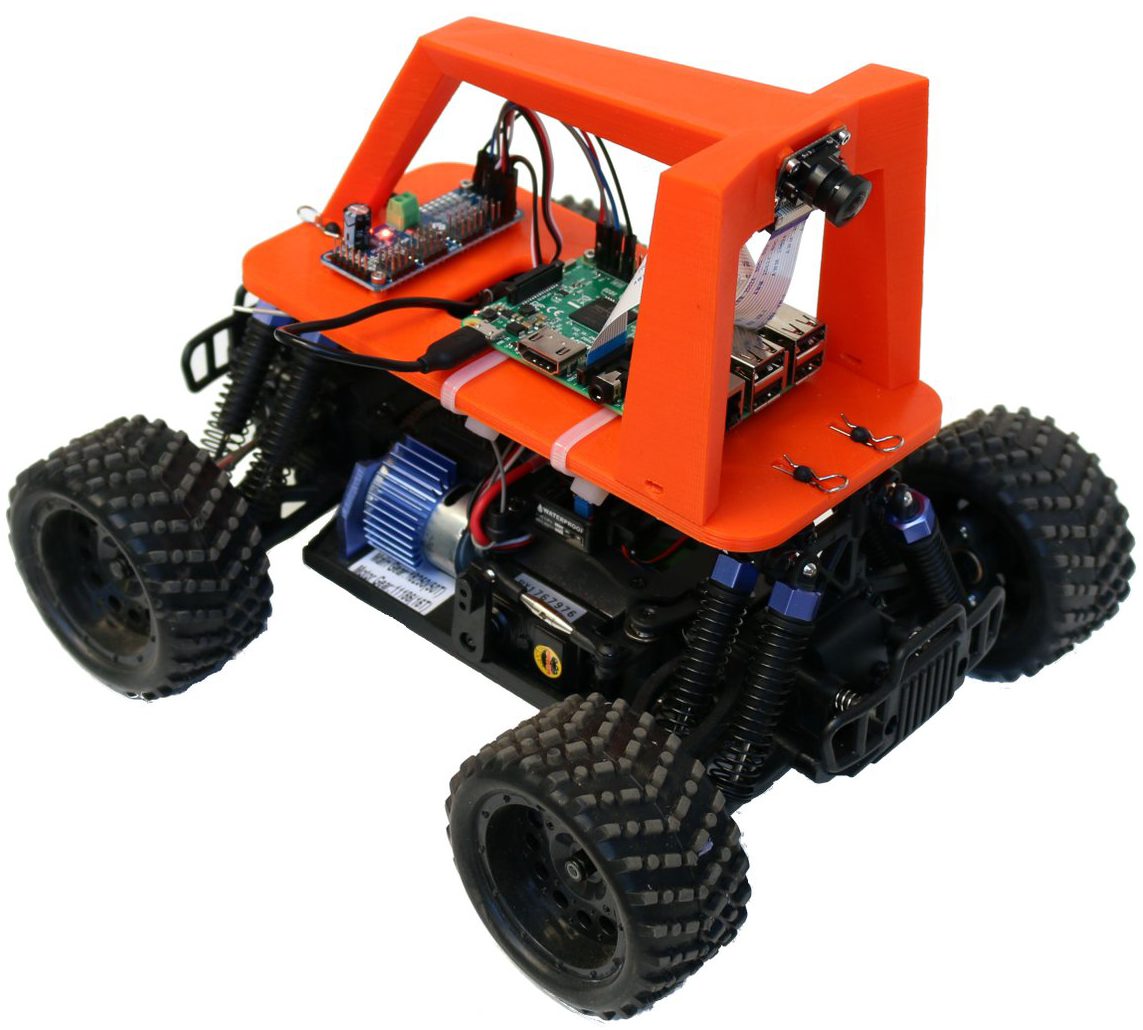
Using the Intel Realsense T265 and the Jetson Nano for a robocar
Thanks to the astoundingly productive Tawn Kramer, I’ve had a chance to play around a bit with his Donkeycar fork that uses the impressive Intel Realsense T265 visual odometry “tracking camera” instead of a regular RaspberryPi camera. Since Tawn’s original work, the Intel Realsense team has released a number of performance improvements for the T265, so it tracks even better now.
I also decided to use a processor with more power than the Raspberry Pi 3 that Tawn used, so I went with the Jetson Nano, which is the only other non-X86 single-board computer I was able to get the Realsense SDK working on (it won’t work on a Raspberry Pi 4, since Ubuntu Mate, which is required, doesn’t run on that yet. Realsense will work on any X86-based SBC, such as an Up Board or LattePanda, but those are a bit more expensive).
It took a while to get all this working, so this post is just a summary of the steps needed.
Steps:
- Follow the Donkeycar installation on Jetson Nano. But when you get to the part about cloning the Donkeycar code, use my fork instead:
git clone https://github.com/zlite/donkey.git - Build Intel Librealsense on Jetson Nano
- Then build pyrealsense2 from source
- Go through this Donkeycar application setup and make sure you note the special Jetson Nano instructions
- Setup your Joystick, following these instructions. (update: see TCIII comment below for updated instructions) I used a PS4 controller (see TCIII’s comment below if you’re using an Xbox controller). Note that you’ll have to pair it via Bluetooth with the Nano. I did that in the Nano’s desktop interface by selecting the Bluetooth icon and adding the controller as a Bluetooth device when it was in pairing mode. The instructions say to set the driver to start at boot by editing the rc.local file, but you may find that the Nano doesn’t already have one. No worries, just create it from scratch and add the necessary line like this:
sudo nano /etc/rc.localpaste /home/pi/env/bin/ds4drv --led 00ff00 into the file. Save and exit. If you’re using a PS3 controller, in manage.py change this line to say this:
cont_class = PS3JoystickController
Set bus num to 1 in myconfig.py:
PCA9685_I2C_BUSNUM = 1
After you’ve done that, set up the directory with this:
donkey createcar --path ~/follow --template path_follower
Running:
cd ~/follow
python3 manage.py drive
Once it’s running, open a browser on your laptop and enter this in the URL bar: http://<your nano’s IP address>:8887
The rest of the instructions from Tawn’s repo:
- When you drive, this will draw a red line for the path, a green circle for the robot location.
- Mark a nice starting spot for your robot. Be sure to put it right back there each time you start.
- Drive the car in some kind of loop. You see the red line show the path.
- Hit X on the PS3/4 controller to save the path.
- Put the bot back at the start spot.
- Then hit the “select” button (on a PS3 controller) or “share” (on a PS4 controller) twice to go to pilot mode. This will start driving on the path. If you want it go faster or slower, change this line in the myconfig.py file:
THROTTLE_FORWARD_PWM = 530 - Check the bottom of myconfig.py for some settings to tweak. PID values, map offsets and scale. things like that. You might want to start by downloading and using the myconfig.py file from my repo, which has some known-good settings and is otherwise a good place to start.
Some tips:
When you start, the green dot will be in the top left corner of the box. You may prefer to have it in the center. If so, change PATH_OFFSET = (0, 0) in the myconfig.py file to PATH_OFFSET = (250, 250)
For a small course, you may find that the path is too small to see well. In that case, change PATH_SCALE = 5.0 to PATH_SCALE = 10.0 (or more, if necessary)
If you’re not seeing the red line, that means that a path file has already been written. Delete “donkey_path.pkl” (rm donkey_path.pkl) and the red line should show up
It defaults to recording a path point every 0.3 meters. If you want it to be smoother, you can change to a smaller number in myconfig.py with this line: PATH_MIN_DIST = 0.3
